🎥 Click here for video alt-text.
An instructional video titled "Create Your Next Application" by GO Smart. This video demonstrates how administrators can quickly launch a new grant cycle by using the "Clone Tools" feature. It shows a user navigating the Grant Editor to an existing program, selecting the "Clone Tools" tab, and clicking "Create New Cycle." The video explains that this process automatically copies all settings, application pages, and status mailers from a previous cycle into a new one, which can then be renamed and updated for the upcoming year.
Cloning vs. Building a New Cycle
When deciding between cloning and building from scratch, consider these options to determine the best approach for your needs:
50% or More Content is Reused: Cloning is usually the fastest choice if at least half of your questions, logic, and mailers will stay the same.
Less than 50% Similarity: Building from scratch may be faster and safer if your new grant is very different from your old one. Follow this tutorial to create a new program.
💡Tip: Regardless of your choice, you can always insert Page Templates to quickly add saved pages and keep your grants consistent. Click here for more information on using Page Templates.
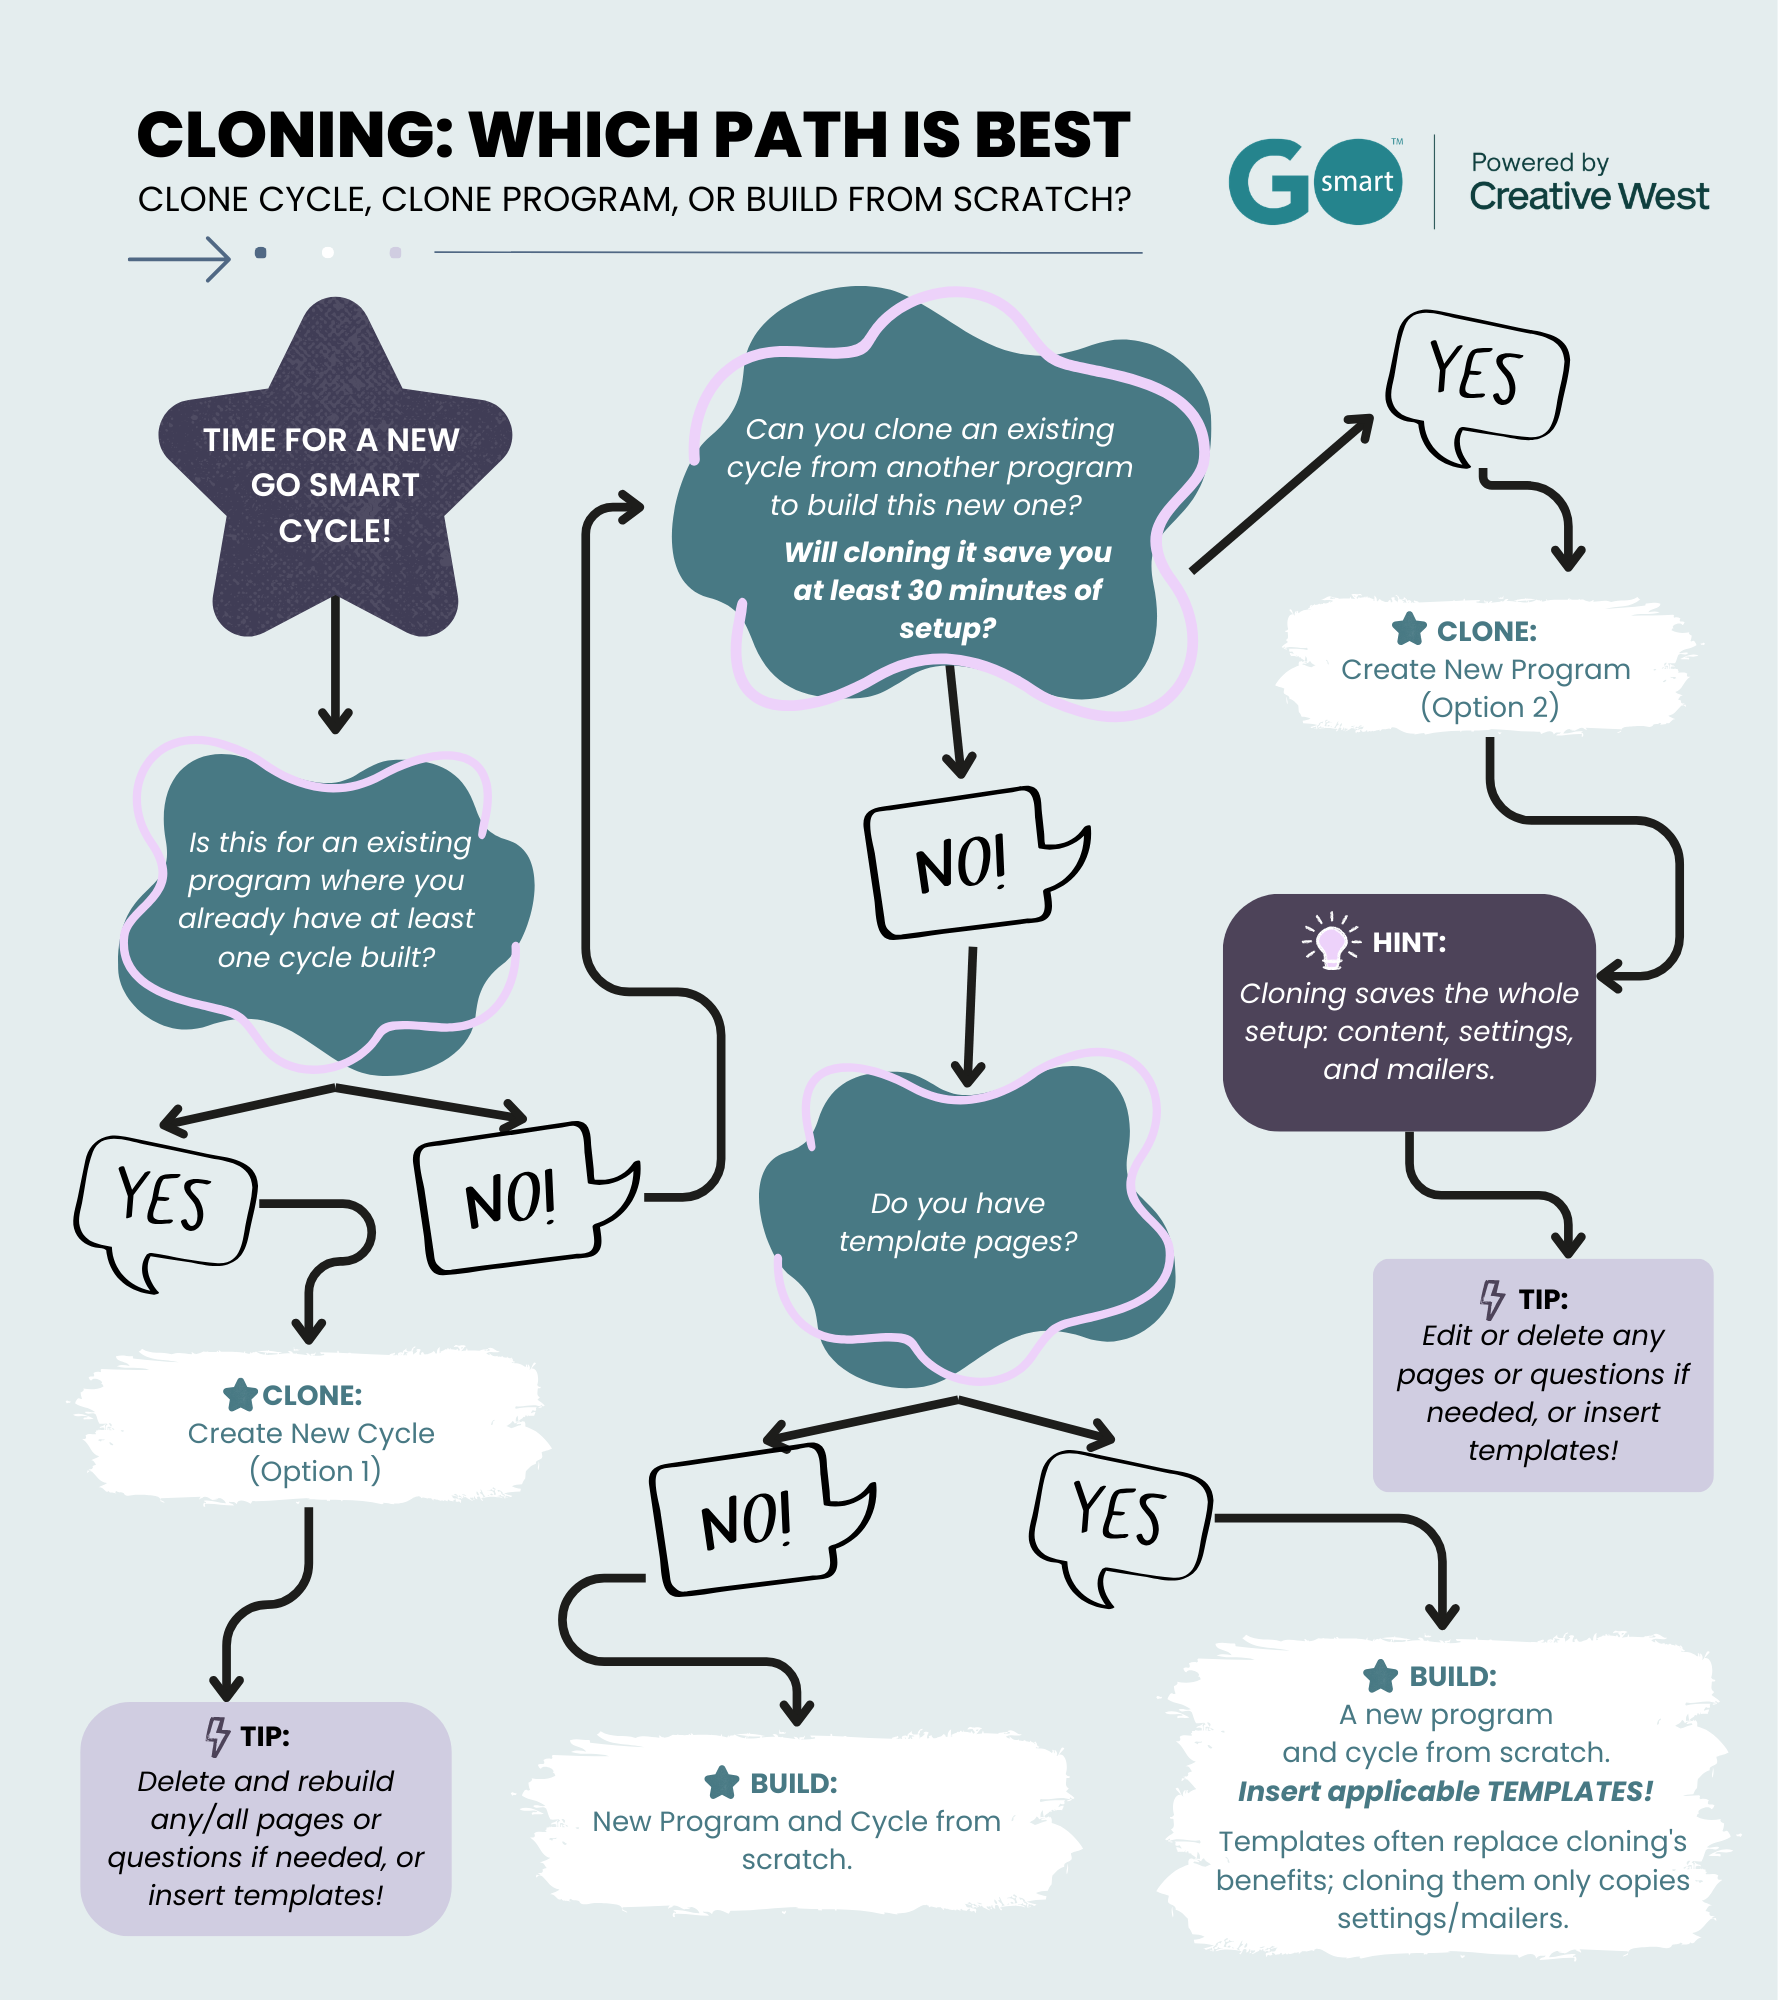
👉 Click this link to view the graphic with alt-text.
Cloning Options
New Cycle: Use this to create the next year of an existing grant (e.g., "Program Support 2025" to "Program Support 2026").
New Program: Use this to duplicate an entire program to start a different one (e.g., copying "Project Grant" to start "Arts Grant").
What is Copied: Cloning copies your cycle settings, application pages, and automated emails.
📝 Note: You must update all this information to match your new grant opportunity.
1. Locate the Program and Cycle
Go to the Grant Editor tab and click on Program Cycles.
From the dropdown menus, choose the program and cycle you want to clone.
2A. Create a New Cycle within the Same Program
In the Clone Tools tab, click Create New Cycle.
If your cycle uses conditional logic, select whether to copy or exclude it.
The Cycle Editor will reload with a new cycle (with EDIT appended to the name).
Rename the cycle and update the prefix (e.g., Fall 2025 Grants). Click Save Changes.
⚠️ Alert: After the first cycle in a program, all future cycles must be created through cloning.
💡 Tip: Use page templates from other programs to quickly refresh the pages in your cloned cycle.
2B. Create a New Program (with its own cycle)
In the Clone Tools tab, click Create New Program.
If your cycle uses conditional logic, select whether to copy or exclude it.
The editor will reload with a new program (COPY) and a new cycle (EDIT).
Rename the cycle (remove EDIT). Click Save Changes.
Rename the program in the Programs sub-tab (remove COPY). Click Update.
⚠️ Alert: If you start a program manually, you cannot later clone another complete cycle into it.
💡 Tip: If you did start manually, you can still save time by inserting Page Templates to reuse your best content.
3. Review and Update Content
After cloning, you must check and update several details before making the new program or cycle available to applicants.
🔎 Review Cycle Details:
Check the Access & Dates and Additional Text sections in the cycle editor.
Update deadlines, instructions, or any other time-sensitive fields.
Click Save Changes.
✍️ Modify Cycle Pages:
Go to the Grant Editor tab → Cycle Pages subtab.
Use the blue ✏️ (pencil icon) to edit each page.
Click Preview Page (top right) to verify the applicant view.
Update any outdated fields or text.
Test, recreate, or adjust conditional logic rules if needed.
Click Update to save changes.
📝 Note: Be careful with Date fields, as they do not update to the new year automatically.
✉️ Adjust Status Mailers:
Go to Status Mailers.
Review cloned status mailers, which are active by default.
Update subject lines, body text, and dates.
Temporarily deactivate any mailers you do not want sent.
🚦Activate the New Cycle:
Return to the Program Cycles subtab → Applicant Access & Dates section.
Change Display from Hide to Show.
Confirm the Open Applications date is in the past and the Deadline is in the future.
Click Save Changes.
📝 Notes:
You might want to set offer Interim Report or Final Report to No until later in the year.
If you are testing the form yourself, the Open Date must stay in the past until you are done.
If you are already familiar with the system, you can use the Preview Page tool instead of doing a full test.